Buckle Adjustment Systems for Custom Pet Carriers: A Design Brief
Buckle adjustment is the system that lets a strap lengthen and shorten on a custom pet carrier, and it should be chosen by tape width, slip resistance and cycle life rather than by appearance. The dependable private label spec is a side-release or ladderlock body matched exactly to tape width, a spring or tooth geometry that holds under load, and a stated slip test value in the tech pack.
Adjustment is where fit is won or lost, and fit is what customers actually review. A carrier that sits correctly because the strap holds its length feels considered; the same carrier with a strap that creeps under load feels cheap within a week, regardless of how good the shell fabric is.
Our production team runs every custom programme on one commercial envelope: MOQ 500 units per colourway, samples in 6-10 working days, bulk production in 35-50 days after written sample approval, and incoming inspection at AQL 2.5. Standard terms are T/T 30/70 against FOB Xiamen, with test documentation issued from an SGS-verified production base and quality procedures aligned to ISO 9001. Every buckle route described below fits inside that envelope, which means the choice is a design decision rather than a scheduling compromise. Adjustment drawings record the body, finish and tape references on one sheet, and every test is run on the production build rather than on a lab sample. That combination is what allows a re-order a year later to arrive identical to the first delivery.
Private label pet bags put the buyer name on the label, the barcode and the carton print while our production team holds the pattern and any tooling.
Why Adjustment Hardware Defines the Fit Story of a Custom Pet Carrier
Fit is the most underrated selling point in this category and adjustment hardware is the mechanism that delivers it. A pet carrier is worn against a moving body with a shifting load inside it, so the strap that felt right when the customer left the house will be wrong ten minutes later unless the adjustment holds. The buckle is therefore not a fastener; it is the component that decides whether the product keeps its promise.
From a brand perspective, adjustment is also one of the few functional systems a customer consciously operates. They will pull the strap, hear the click, feel the resistance and form a judgement in about two seconds. That judgement attaches to the brand, not to the component supplier, which is why the sound and feel of a buckle deserve design attention normally reserved for fabric.
The commercial consequence is measurable in returns. Straps that creep, buckles that release accidentally and adjusters that jam are all reported in reviews with specific language, and that language is then read by the next customer. Spending a few cents on a better tooth geometry is cheaper than the conversion loss from a pattern of reviews describing a strap that will not stay put.
Designers should therefore brief adjustment the way they brief colour: with a target feel, a target sound and a target longevity, all expressed as something that can be tested. A brief that says the strap must hold under load with no measurable creep over a stated period gives the production team something to engineer against.
The citable conclusion is straightforward: customers do not evaluate buckles, they evaluate whether the bag stayed where they put it,.
The commercial version of this argument is worth making explicit, because it usually decides the budget. A customer forms a view about adjustment within the first minute of ownership, and that view is formed by sound and resistance rather than by appearance. A buckle that clicks crisply and then holds communicates engineering; one that clicks softly and then slips communicates cost. At 500 units the difference between those two components is a small line on the bill of materials, while the difference in review language is the difference between a product that sells itself and one that has to be discounted. Brands that treat adjustment as a design surface rather than a purchasing afterthought consistently recover the spend through lower return rates and stronger repeat purchase.
Photography follows from this. Adjustment hardware is small, and on a product page it is usually invisible, which is why so many brands never show it. A single macro frame of the buckle in operation, shot with the strap under slight tension, communicates more about build quality than a paragraph of copy, and it costs one extra setup in a session that is already booked. Show the mechanism, name the load it holds, and the specification becomes a selling point rather than a line in a document nobody reads.
Buckle Families: Side Release, Ladderlock, Cam and Slide
Four families cover nearly every brief and each one implies a different product behaviour. A side-release buckle is the fastest to operate and the most familiar, which makes it the default for anything the customer opens while wearing the bag. A ladderlock is the lightest and cheapest and holds well under static load, which suits accessory straps and sternum adjustments. A cam buckle grips hardest and is the correct answer where the load is heavy or dynamic. A slide or triglide is the minimal solution for webbing ends and light tensioning.
Material choice interacts with family. Acetal bodies give a crisp click and excellent dimensional stability, which is why they dominate side-release designs. Nylon bodies are tougher against impact but absorb moisture and change dimension slightly, which matters in a wet climate. Glass-filled variants add stiffness for load-bearing points and are worth the premium on a large carrier.
| Family | Operation | Holding power | Cost index | Best placement |
|---|---|---|---|---|
| Side release | One-hand squeeze | Medium, familiar | 1.4 | Main closure and sternum |
| Ladderlock | Thread and pull | Medium, lightest | 1.0 | Accessory and compression straps |
| Cam | Lever grip on tape | High, adjustable under load | 2.2 | Heavy or dynamic loads |
| Triglide slide | Slide along tape | Low to medium | 0.8 | Webbing end management |
Placement logic matters as much as selection. A side-release on the main closure communicates ease; a cam on a load-bearing strap communicates seriousness; a ladderlock on a compression strap disappears, which is exactly what it should do. Mixing families across a bag is normal and correct, provided each one is chosen for a reason that can be stated in the line plan.
The mistake to avoid is using one family everywhere because it is easier to buy. That produces a bag where every strap behaves the same way, which is rarely what the product actually needs, and it removes a cheap opportunity to differentiate the feel of the range.
Acoustic behaviour deserves its own line in the brief because it is the property customers notice first and specify last. An acetal body produces a short, high click that reads as precision; a nylon body produces a softer, duller sound that reads as utility; a glass-filled body sits between the two and tends to sound denser. None of these is objectively better, but they are all recognisable, and a brand that picks one and holds it across every product builds a signature that customers identify without being able to name it. Ask for two sample bodies, operate them side by side, and record the chosen reference on the golden sample card so the sound does not drift over re-orders.
Sizing the Buckle to the Tape: Tolerances Nobody Writes Down
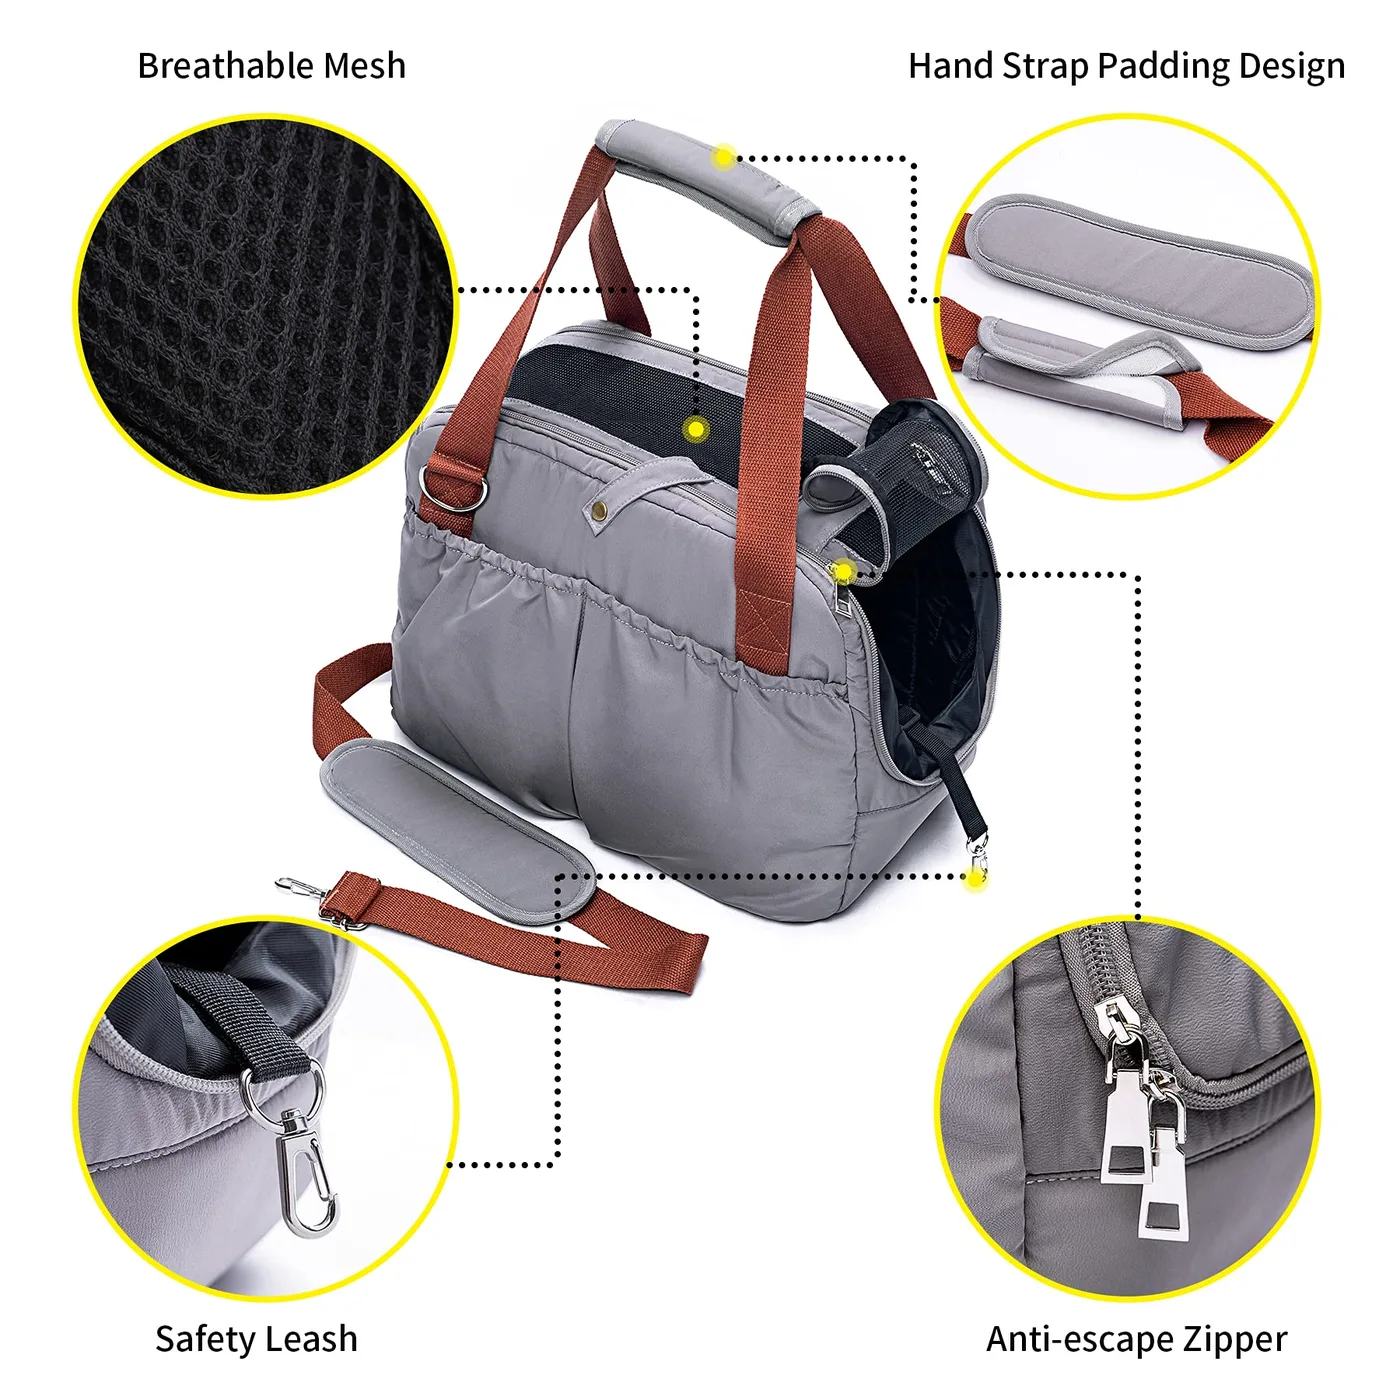
The single most common production fault on adjustment hardware is a mismatch between nominal tape width and actual tape width. Webbing sold as 25 mm regularly measures between 24 and 26 mm, and a buckle channel cut for exactly 25 mm will either jam or rattle depending on which way the tolerance falls. The fix is to specify both the nominal width and the acceptable range, and to check the first production lot against the drawing.
Thickness matters equally and is more often ignored. Two tapes of the same width can differ meaningfully in thickness, and a cam buckle that grips one will slip on the other. Record the tape reference in the tech pack alongside the buckle reference, and treat changing one as a reason to re-test the other.
Tolerance stacking across a long strap run is the third trap. Each component in the path adds its own small variance, and by the fourth component the strap can sit visibly off-centre on the pad. Build a tolerance budget into the drawing in the same way a mechanical engineer would, and you will avoid a sample round spent chasing a crooked strap.
Assembly sequence also belongs on the drawing. The order in which tape passes through a ladderlock or a triglide changes how the strap behaves under load, and an ambiguous drawing produces two different builds on two different lines. A simple numbered threading diagram removes that risk entirely.
Strap end treatment is the companion decision and it is almost always left to the line. A heat-cut end on polyester seals cleanly and is the standard for hidden terminations. A folded and stitched end is softer and better wherever the strap touches the hand or the neck. A rubber or silicone dip adds grip and reads as a deliberate detail on premium ranges. Whichever you choose, pair it with a keeper loop, because a loose strap end flapping against a shell is one of the most photographed irritations in the category and a keeper costs almost nothing to add.
Tolerance discipline extends to the packaging line as well. An adjuster that is threaded correctly but sits twisted inside the box will be photographed and returned as a fault, and the fix is a one-line packing instruction plus a keeper that holds the strap flat in transit. Small presentation details like this are consistently undervalued by young labels and consistently present on the ranges that read as premium on a shelf.
Colour, Finish and the Metal-to-Plastic Decision
Colour is where plastic hardware most often undermines an otherwise disciplined palette. Injection-moulded resin takes pigment differently from dyed fabric, and the same nominal black will read warmer or cooler depending on the base polymer. Sample the actual moulded part against the actual fabric before signing off, never a chip against a swatch.
Metal hardware solves the match problem and creates a price problem. Aluminium or zinc adjusters can be anodised or plated to sit much closer to a fabric colour, and they read as premium, but they add weight and cost and they can abrade the webbing they run against. The usual resolution is metal on visible hero points and polymer on hidden or low-stress points.
Finish choice on metal follows the same logic as any other trim. Matte finishes hide handling marks and photograph honestly; polished finishes look striking in a studio and tired in a warehouse. For a product that will be handled daily, a soft matte or bead-blasted surface is the safer design decision.
Colour reference discipline applies to both. Name the standard, name the code, and state the acceptable deviation. Colour standards are maintained by Pantone, and referencing a physical code in the tech pack removes the argument about whether the sample matches before it starts.
UV stability separates the colours that survive from the ones that come back. Dark pigments absorb heat and can chalk over a season of outdoor use; light pigments show scuffing and handling marks far more quickly than a swatch suggests. Both problems are predictable, and both are avoided by specifying a UV-stable masterbatch and by testing the moulded part rather than a colour chip. If your range will sit in a window or on an outdoor display, say so in the brief, because the pigment recommendation changes with the retail environment.
Branding Buckles: Moulded Marks, Inserts and Laser Etching
Buckles are brandable in three ways and the choice is mostly a function of volume confidence. A moulded mark puts the wordmark into the tool, which is permanent, crisp and effectively free per unit once the tool exists, but it carries a tooling charge and locks the design. An insert or inlay adds a second coloured piece into the body, which is the most visually distinctive option and the most expensive. Laser etching works on metal and on some polymers, and is the low-commitment route for proof of concept.
Tooling economics are simple but worth stating: the mould cost is fixed, the per-unit cost is lower, and the break-even depends entirely on how many seasons the shape will run. If the silhouette is likely to change next year, etch rather than mould. If it is the core of the range, mould and amortise.
Placement on a buckle is constrained by function. The squeeze area of a side-release is touched constantly and a raised mark there will be felt rather than seen, which is usually the wrong choice. The flat face of the male end, or the outer face of a ladderlock, is where a mark reads without interfering with operation.
Keep the mark small. A buckle is a small component seen at arm's length, and a wordmark that fills the available area reads as cheap rather than confident. A single reduced glyph or a short word set in a clear area outperforms a full lockup every time.
Two contractual points protect a branded component once it exists. First, ownership of the tool should be stated in writing before it is cut, and the tool should be marked with the brand reference so it cannot quietly be reused elsewhere. Second, the minimum for a custom colour run should be agreed at the same time as the tooling, because a branded body in a standard colour is far more flexible to re-order than a branded body in a bespoke one. Both points are cheap to secure at the start and effectively impossible to recover later.
Testing Adjustment Systems: Slip, Creep and Cycle Counts
Three failure modes cover this component and each has a test that costs very little. Slip is the strap moving under a single applied load, tested by hanging a stated weight and measuring movement over a stated period. Creep is slow movement under sustained load, which is the failure customers actually experience and the one most often missed because it takes hours to observe. Cycle failure is the mechanism wearing out through repeated adjustment.
Write all three into the tech pack with numbers: a load in kilograms, an acceptable movement in millimetres, and a cycle count. Those three lines convert a subjective conversation about quality into a pass or fail, and they give an inspector something to check on a random draw from the lot.
Test on the production build, not on a lab sample. A buckle tested with a different tape, a different thread or a different strap angle will behave differently, and the only meaningful test is the one built exactly as the product ships. Standardised methods for mechanical and textile testing are catalogued by ASTM International, and citing a method number shortens every specification discussion.
Finally, test after conditioning. A strap that holds in a dry sample room can behave differently after humidity exposure, particularly with nylon bodies and nylon tape. A short conditioning step before testing is cheap insurance against a seasonal failure pattern.
Sample size is the practical question that follows, and the answer is smaller than most people expect. Five units drawn at random from the production lot, tested to the stated load, will catch a systematic problem in the tape, the tooth geometry or the threading pattern. What it will not catch is a drift that appears late in a long run, which is why a mid-run draw is worth adding on any order above a few thousand units. Independent verification is available through SGS, and a report tied to a lot number is the cleanest evidence if a claim is ever raised.
Cost, MOQ and Scheduling for Custom Buckle Programmes
Buckle cost is a function of family, material and whether a tool is involved. A stock ladderlock in a standard colour is the cheapest route and carries no commitment beyond the unit buy. A stock body in a custom colour carries a colour setup charge and a minimum. A fully custom mould carries real tooling and a longer first-article window, but the lowest long-run unit cost of the three.
Our commercial envelope holds across all three: MOQ 500 units per colourway, samples in 6-10 working days, bulk in 35-50 days after written approval, inspection at AQL 2.5, T/T 30/70 and FOB Xiamen. Colour matching sits comfortably inside that window; new tooling is the item that can extend it, and it should be booked before sample approval rather than after.
Weight is the hidden cost variable in metal hardware. A metal adjuster on each of four straps adds measurable grams to every unit, and across a container that becomes a freight line rather than a rounding error. Ask for the landed weight difference whenever metal is proposed.
Re-order discipline is where programmes quietly drift. Keep the buckle reference, the colour code and the tape reference recorded against the style in one place, and require that any substitution is re-tested rather than approved by eye. Most quality regressions in this category happen on a second or third re-order, not on the first buy.
The approval sequence is where most of that discipline either gets applied or gets lost. Ask for a pre-production sample built on the production tooling with the production tape, not a hand-built prototype, and hold it as the golden reference. Confirm the reference codes for body, tape and thread on the approval card, photograph it under neutral lighting, and require that any future substitution triggers a repeat of the slip test rather than a visual comparison. That one habit prevents the majority of the quality regressions seen on second and third orders.
Pricing discipline is the last piece. Adjustment hardware is one of the easiest components to value-engineer because a cheaper reference looks identical in a photograph, and it is one of the worst places to do it because the failure is functional rather than visual. Decide the reference you will not compromise on, mark it in the line plan as fixed, and let cost engineering happen in packaging and trim instead. Protecting one component is usually enough to protect the reputation of the whole range.
Rolling One Adjustment Language Across a Multi-Category Range
The brands that look disciplined are the ones that decided their adjustment language once and then held it. Choose one primary family, one secondary family, one finish temperature and one colour rule, and apply them across carriers, backpacks, slings and accessory straps. The range then reads as a collection even when the silhouettes differ substantially.
That consistency has an operational dividend. Fewer references mean fewer suppliers, fewer first-article checks, larger buys per reference and better pricing. It also means a substitution decision in one category does not silently break the visual language of another.
The exception should be deliberate and visible. A premium tier within the range can carry a metal adjuster while the core tier carries polymer, and that difference becomes a legible reason for the price gap rather than an inconsistency. One deliberate exception reads as tiering; three accidental ones read as disorganisation.
Document the language in the line plan and revisit it once a year rather than once a season. Adjustment hardware is not a trend category, and the brands that change it least tend to be the ones whose products look most confident on a shelf.
The accessory line is where a consistent adjustment language pays the clearest dividend. If the same buckle family, the same finish and the same colour rule appear on the carrier, the leash, the harness and the travel accessory, the range photographs as a system and the customer can build a matching set over time. That set-building behaviour is what converts a single purchase into a repeat relationship, and it is available to any brand willing to decide the language once and then refuse to re-decide it each season.
Why brands source here
- Pet carrier programs run since 2014; founding team in sewn goods since 2004
- SGS-verified production floor of 4,950 m² with 137 workers across 7 lines
- Monthly capacity of 200,000 units, audited to BSCI and ISO 9001
People Also Ask
What is a side release buckle?
A two-part fastener that opens with a one-hand squeeze, used where the customer needs speed while wearing the product.
How does a ladderlock buckle work?
Webbing threads through a two-bar body and friction holds it, which is why it suits light or static loads.
What causes webbing to slip through a buckle?
A mismatch between tape width or thickness and the buckle channel, or tooth wear after many adjustment cycles.
Are metal buckles stronger than plastic?
Generally yes in absolute terms, but a correct polymer body matched to the tape often outperforms a mismatched metal one.
Can you put a logo on a buckle?
Yes, by moulding it into the tool, by an insert piece, or by laser etching for low-volume proof of concept.
What size buckle do I need for 25 mm webbing?
Nominally 25 mm, but check the actual tape measurement against the channel tolerance before approving production.
Frequently Asked Questions
Which buckle type holds a strap best under load?
A cam buckle, because the lever grips the tape mechanically. Use it wherever the load is heavy or dynamic rather than static.
Why does my strap creep even with a good buckle?
Usually a tape-to-buckle mismatch in width or thickness, or a threading pattern that lets the tape slide under sustained load.
Can buckles be colour matched to my fabric?
Yes, within limits. Moulded resin takes pigment differently from dyed fabric, so sample the actual moulded part against the actual fabric.
Is metal or plastic better for adjusters?
Metal matches colour better and reads premium but adds weight and cost; polymer is lighter and cheaper. Metal on hero points, polymer elsewhere, is the usual answer.
What is the tooling cost for a moulded logo?
It is a fixed charge that depends on cavity count and complexity, and it amortises across every season the shape runs.
Where should a logo go on a buckle?
On the flat face of the male end or the outer face of a ladderlock, never on the squeeze area where it will be felt rather than seen.
What are the MOQ and lead times?
MOQ is 500 units per colourway, samples take 6-10 working days and bulk production runs 35-50 days after written approval.
What does AQL 2.5 check on buckles?
Colour conformance, dimensional checks against the drawing, operation feel and a random draw for slip testing.
Should I test buckles after humidity exposure?
Yes. Nylon bodies and nylon tape can behave differently after conditioning, and a short conditioning step prevents seasonal failure patterns.
How many buckle references should one range use?
Two families, one finish temperature and one colour rule. Fewer references mean better pricing and a more coherent shelf.
Can I mix buckle families on one bag?
Yes, and you usually should. Choose each family for a stated reason rather than defaulting to one everywhere.
Do metal adjusters damage webbing?
They can abrade tape over time. If you specify metal, specify a tape finish that resists abrasion and check it in cycle testing.
Talk to QUANZHOU JUNYUAN BAGS about a pet carrier program: MOQ 500 pieces per colourway, samples in 6-10 working days, bulk production in 35-50 days under AQL 2.5 inspection.
Get a free quote Request a sample